As you may have noticed by now, I have taken a liking to Adobe Substance 3D Designer. During my final project, I already experimented a bit with flipbook animations that I created in Designer. I remember how much effort it took to render the image sequence, and I was glad to have come across SpriteIterator by Jonas Olesen, even though its use had a few limitations.
To improve the workflow, I have now created a plugin that can export image sequences directly. It is not yet perfect for creating flipbooks or sprite sheets, as individual images are created, but the step to the flipbook is then only one command away, for example by using ImageMagick.
For those who are impatient: Click here to download
Animations in Designer
Some wonderful and very impressive examples of animations created entirely in Designer are a few of Kelly Recco’s portfolio pieces, particularly Lab Incubators and Dragon Egg.
As Kelly describes in her retrospective, her animations are based on $time, a global variable that, according to the manual, contains the number of seconds that have elapsed since the Substance Engine was started. The advantage of this is that you can then use Substance Player to export image sequences.
One disadvantage is that you only have limited control when using it, as time passes continuously. Since I like to remain control, I use my own variable, which I can then change as needed and, for example, fast-forward or rewind as I wish.
The Plugin
Installation
Installation is quick and easy. Simply start the Plugin Manager via Tools -> Plugin Manager… and select the previously downloaded and unzipped plugin under INSTALL….
After successful installation, Export appears as an additional entry in the menu bar. Below this is the item Export Sequence, which opens the configuration window for the exporter.
Small example graph
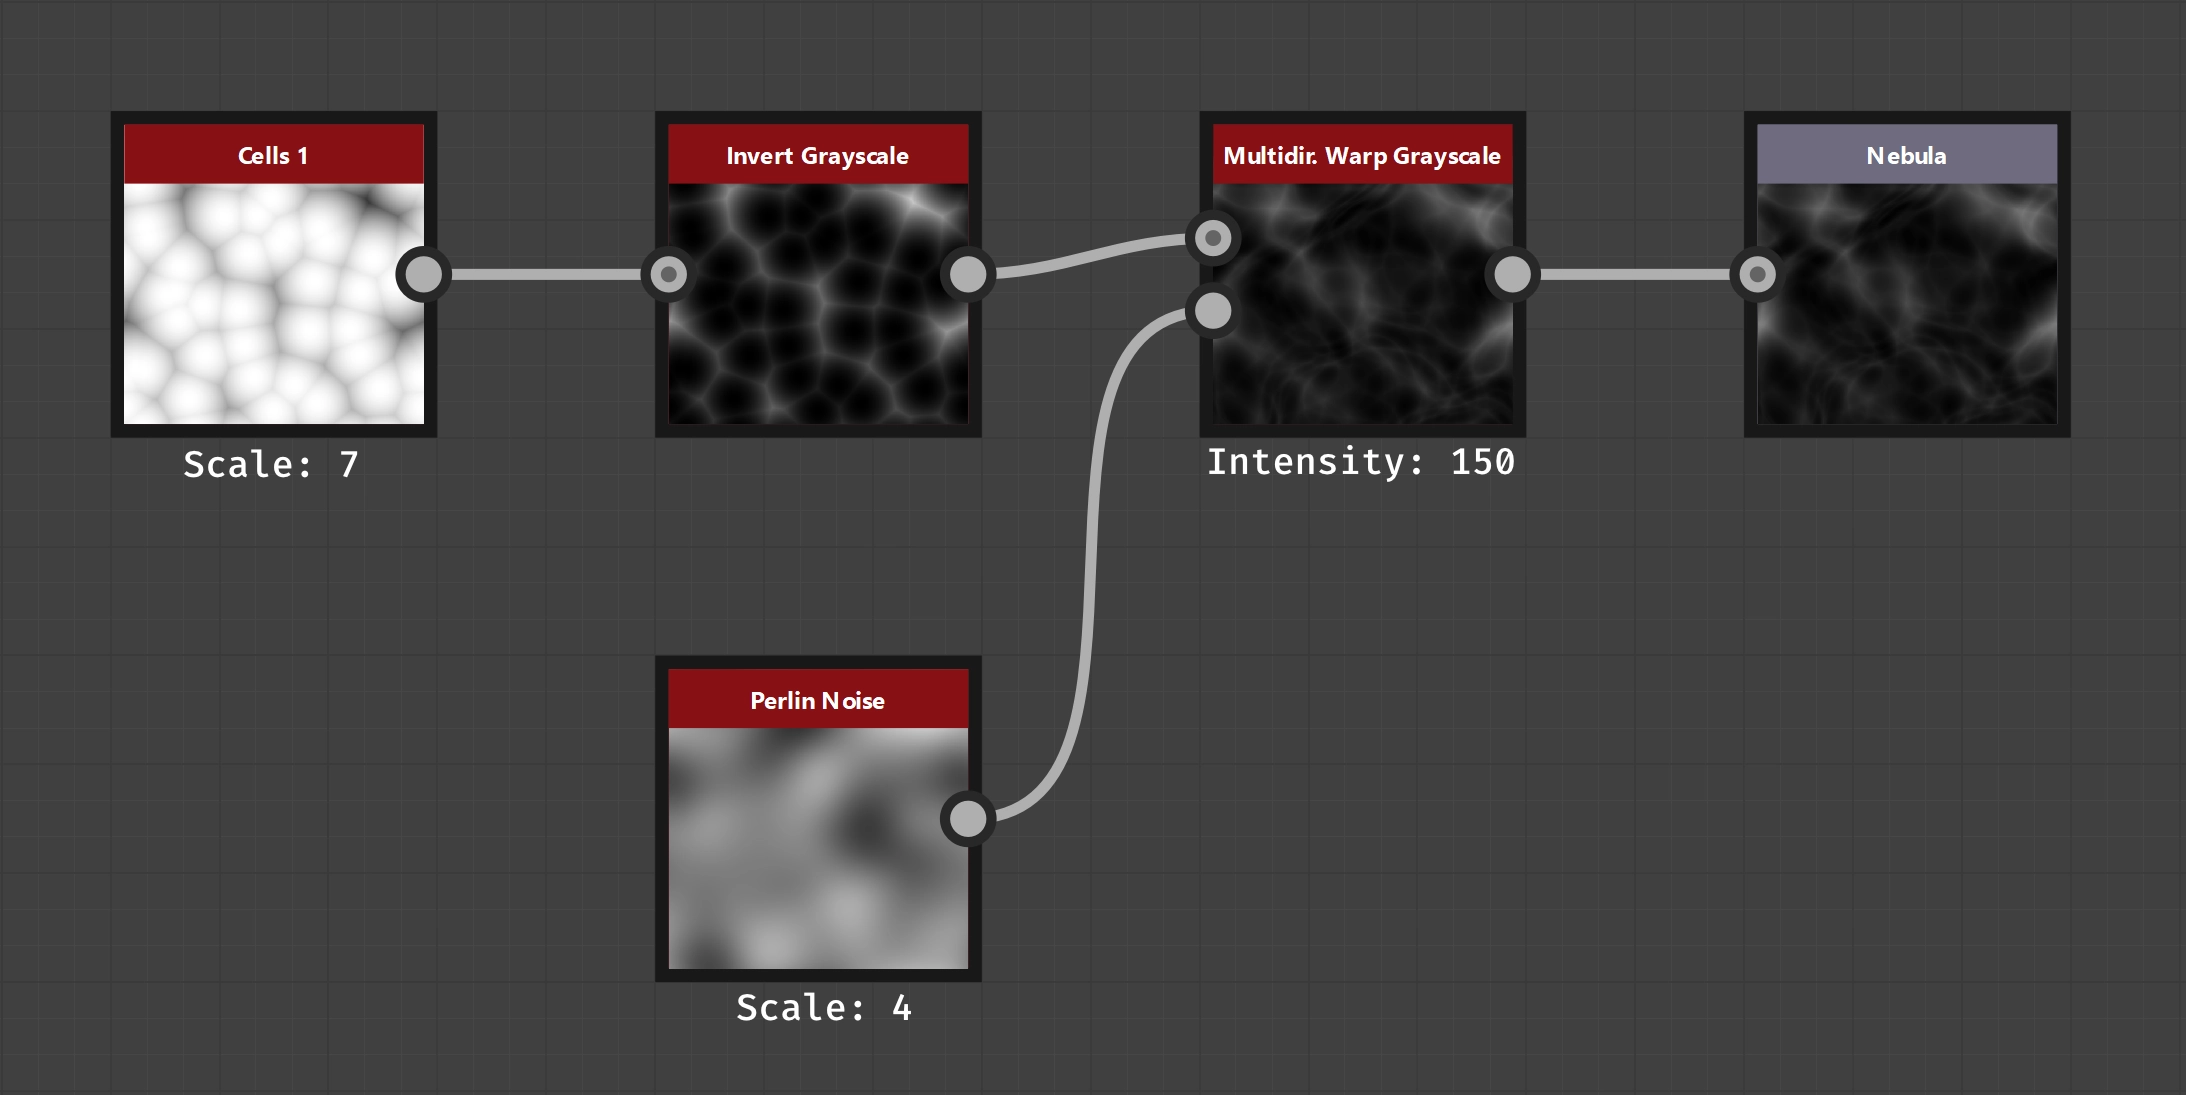
To see the advantages of the plugin directly, here is a small example. It is one of my sample graphs that I created during plugin development:
Small example graph
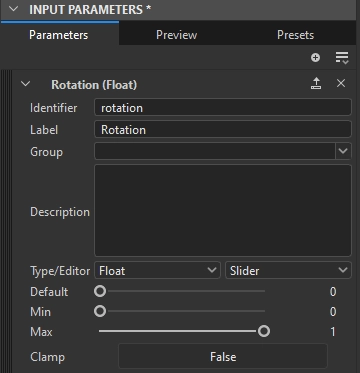
Input parameter configuration
This is now a completely normal static graph. We can animate it by adding an input parameter to the graph. The idea is to use the parameter to influence the Warp Angle of the Multidirectional Warp Grayscale and thereby create the impression of a swirling movement.
In this example, I have opted for a float parameter called rotation. Since Warp Angle has a value range of 0 - 1 according to [documentation](https://helpx.adobe.com/substance-3d-designer/substance-compositing-graphs/nodes-reference-for-substance-compositing-graphs/node-library/ filters/effects/multi-directional-warp.html), I also configured this as the minimum and maximum value in the parameter. I did not use clamping. Since I assume that Warp Angle calculates internally using rotations, the number before the decimal point should have no effect. This is because half a rotation should produce the same result as one and a half rotations.
I also entered a suitable label, as I think this is best practice and it’s the value you can select by default in the exporter plugin’s configuration dialog, as you’ll see later.
Now that the graph has been configured, all that remains is to adjust the Warp Angle. To do this, simply select the previously created parameter in the Warp Angle configuration menu (), and the necessary function will be generated automatically.
Usage
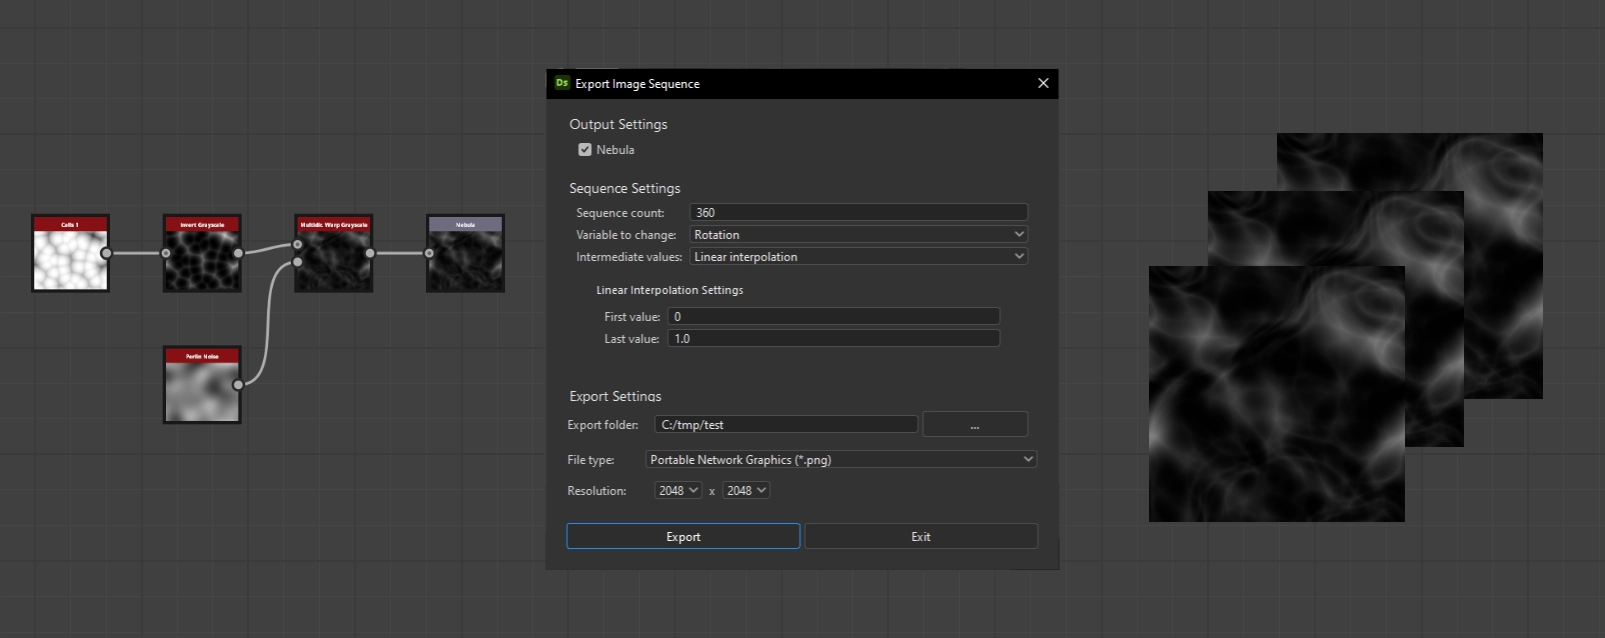
Plugin configuration dialog
The configuration window shown here is opened by clicking on Export -> Export Sequence in the menu bar. The dialog window consists of three parts: “Output Settings”, “Sequence Settings”, and “Export Settings”.
The “Output Settings” contain all compatible outputs of the graph. The neighbouring checkbox can be used to decide which outputs are to be exported. The stored labels are displayed there by default, but if no label exists, the identifier is displayed. At least one output must be exported. By default, all outputs are marked for export.
In the “Sequence Settings” you can configure how many images the sequence to be exported consists of, which parameter is the variable to be changed, and how it should be changed. Currently, you can choose between linear interpolation and manual values.
In the “Export Settings” you can then configure the folder to which the export should take place, the file format to be used, and the resolution in which the outputs should be generated.
Finally, click on Export and, depending on your hardware and the settings you have chosen, you can sit back and relax or stretch your legs a little. This is when the real work begins, as the graph is recalculated for each variable value and the results of the selected outputs are exported. The exported images follow the naming scheme <GRAPHNAME>_<OUTPUT>_<N>, where <N> is a sequential number starting with 1.
If you have followed this example completely, you should now have 360 images that should look like the following video:
Download
I make the plugin available to all interested parties free of charge under CC0 1.0![]()
![]() .
.
So you can actually do anything legal with it, as long as you don’t make me responsible for any mistakes. However, if you find any mistakes, I would be happy if you let me know so that I can correct them 😉